Creating a task with attachments, with a link to crm, with a parent task and a check list for self-hosted Bitrix24
This activity allows to create tasks with a link to CRM entity, with possibility of a subtask and a checklist for the Business Process Designer.
Attention This activity developed for the Business Process Designer, without module «Business-Processes» doesn’t work.
Previously, for each specific additional opportunity of creating tasks from the Business Process Designer — a link to CRM, a task with attachments, a task with a check list — different activities were used.
Now we have created a new activity, which includes all these possibilities.
This complex activity extends the standard mechanism for creating a task from the Business Process Designer, eliminating unnecessary actions for editing the created task after the completion of the business process.
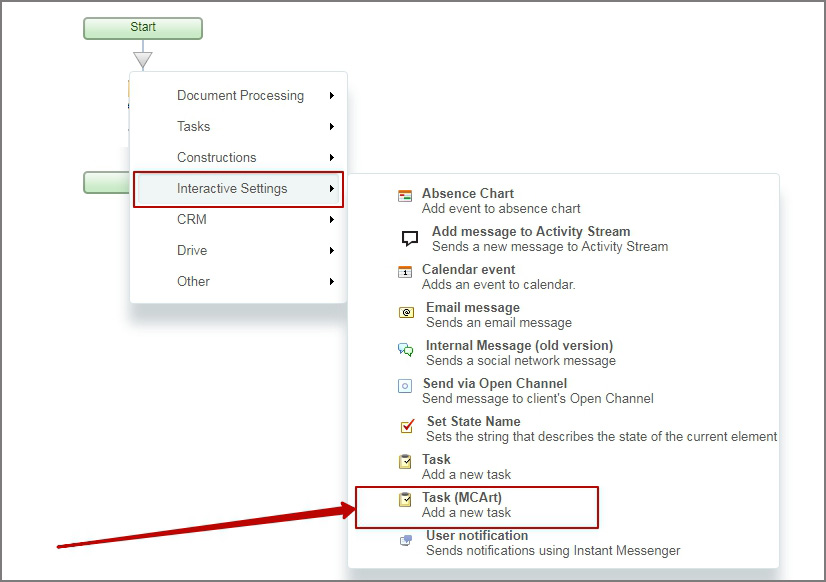
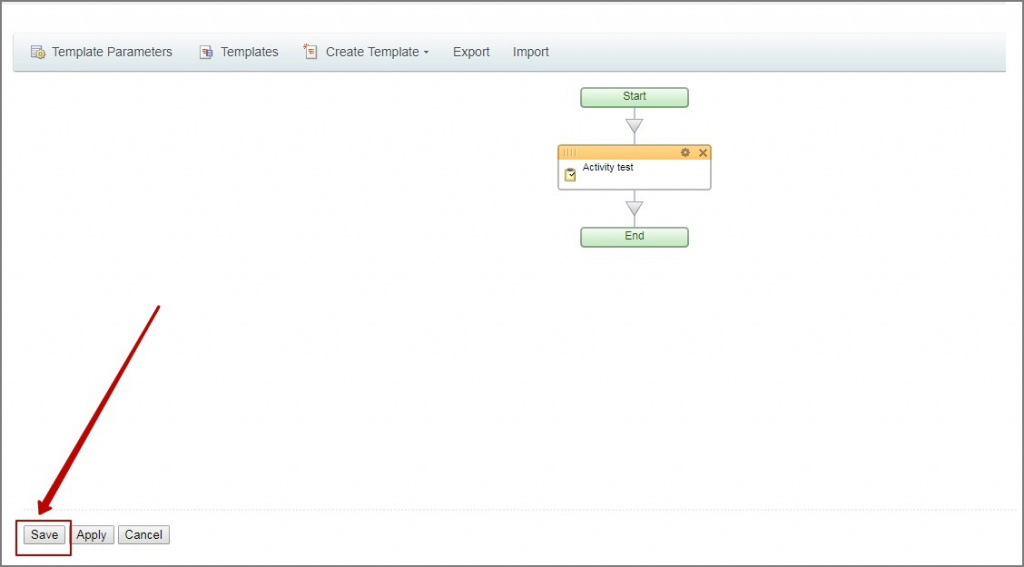
After installation of this activity, a new option in the Business Process Designer will appear «Interactive Settings — Task (mcart)». Add it to the business process chain and fill in the parameters window.
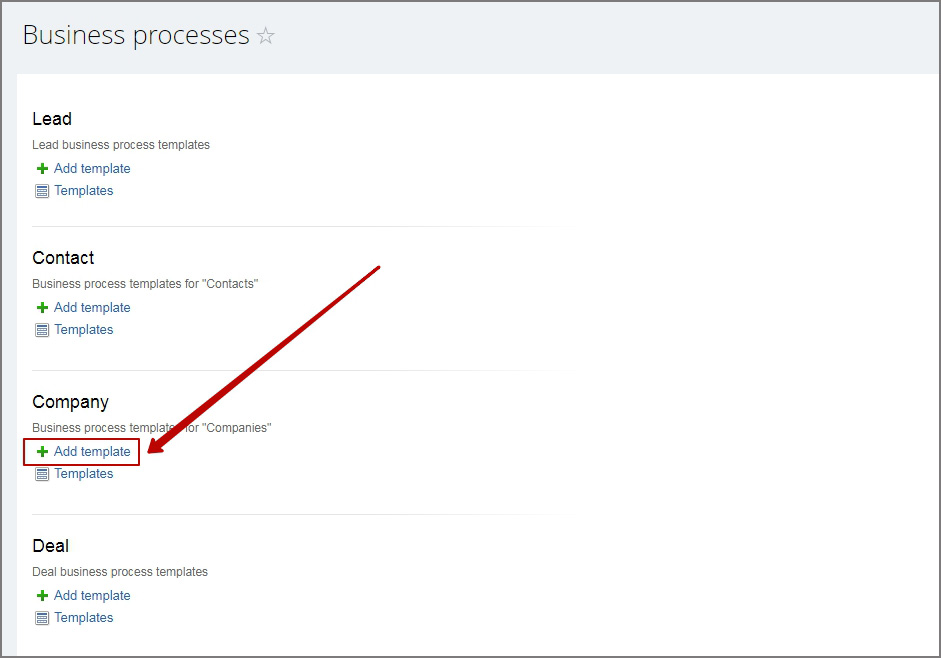
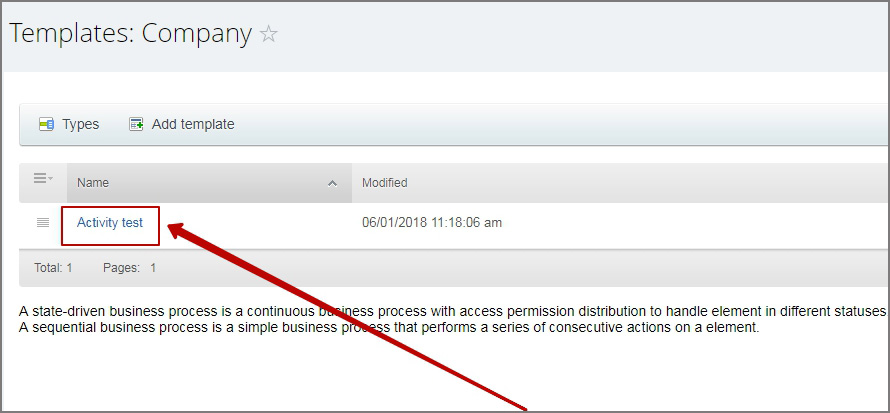
For example, let’s create a business-process template for a company.
Below we will consider an example of filling the fields of the activity parameters.
Configuring the Activity Settings
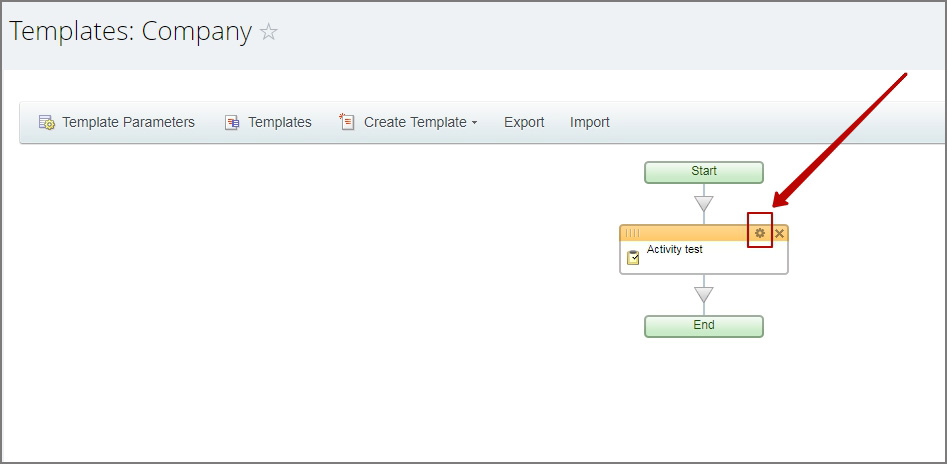
Click the parameters button on the block «Task (mcart)» and fill in the fields:
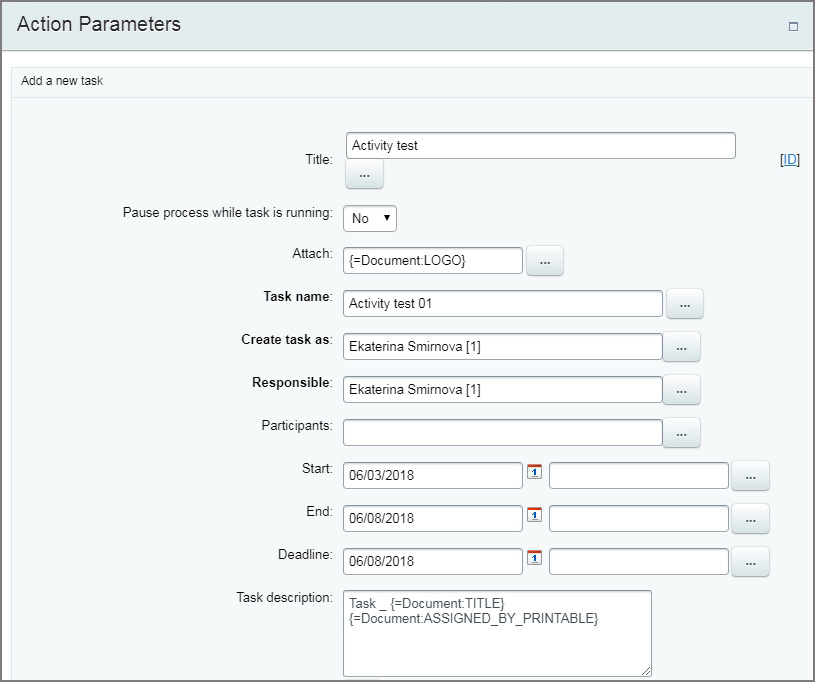
- Title — specify the name of the activity for identification in the Business Process Designer chain
- Attach — here you can specify the attachment
- Task name — this name will be used for the created task. You can use the substitution of values for the name by selecting from the list
- Create task as — the director for the task
- Responsible — the responsible for the task
- Participants — if necessary, specify co-executors for the task
- Start — specify the task start date
- End — specify the task end date
- Deadline — specify the task deadline date
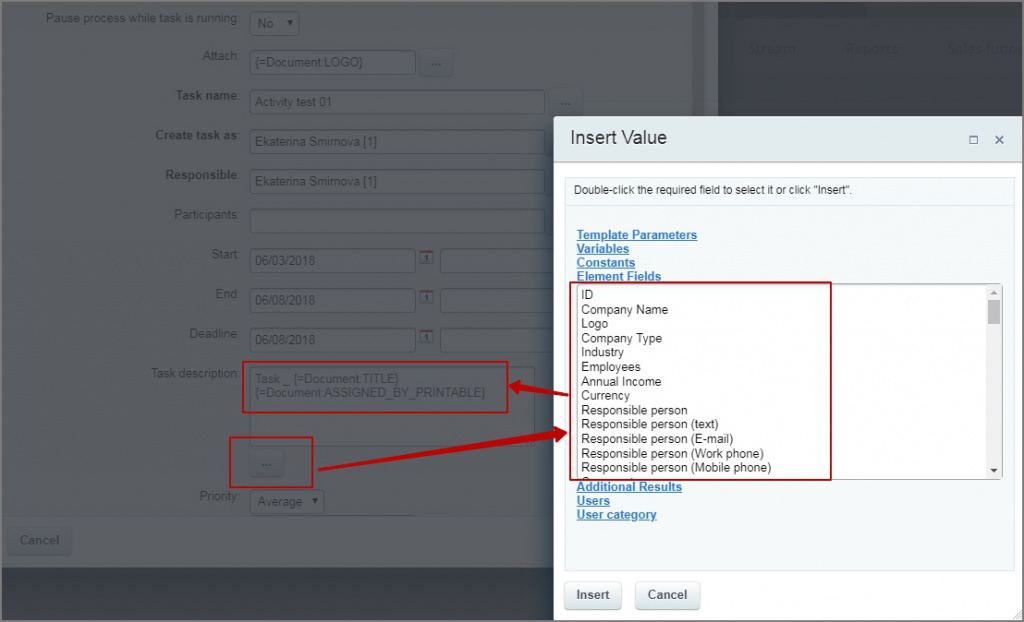
- Task description — enter the description of the task, you can use the links from the list
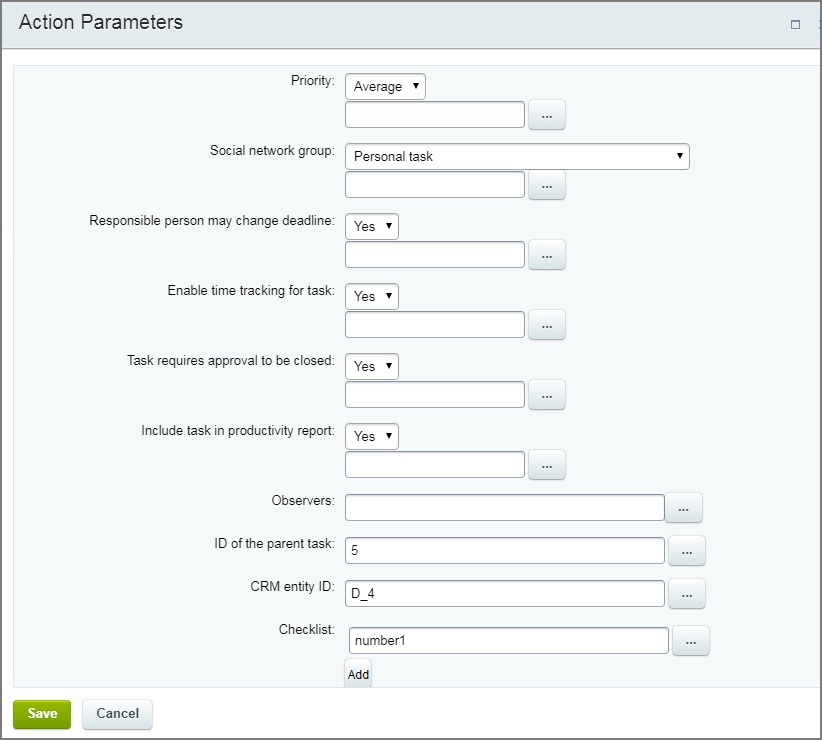
- Priority — select the task priority (low, average, high)
- Social network group — if necessary, indicate the relationship of the task to a specific working group or project
- Responsible person may change deadline — yes or no
- Enable time tracking for task — yes or no
- Task requires approval to be closed — yes or no
- Include task in productivity report — yes or no
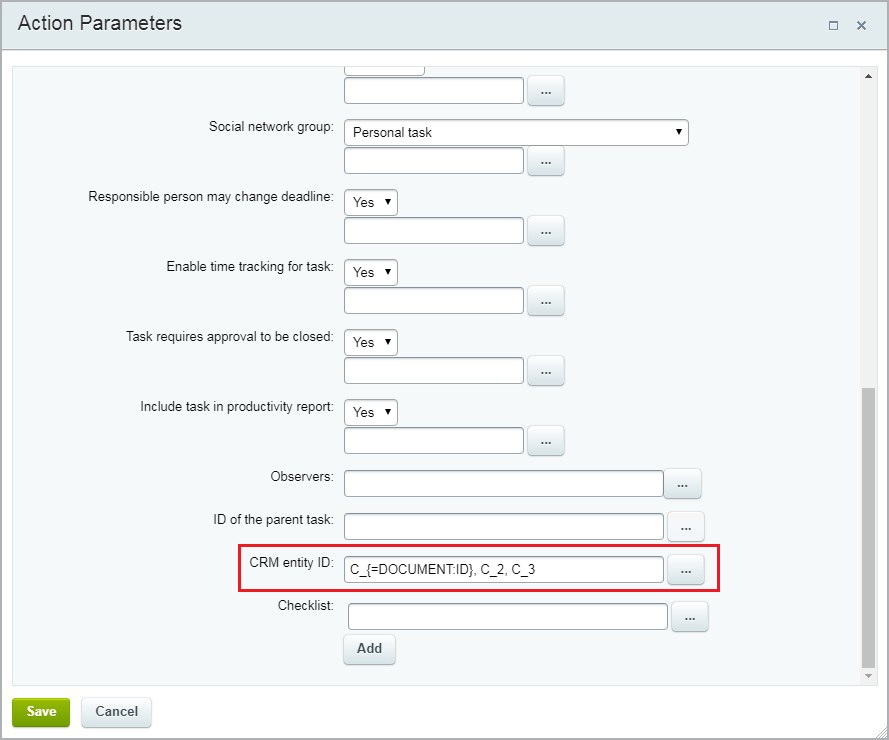
- Observers — if necessary, specify the observers for the task
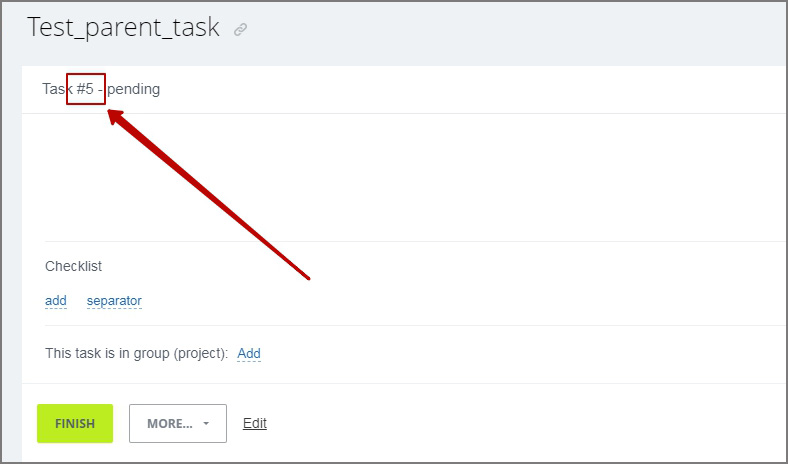
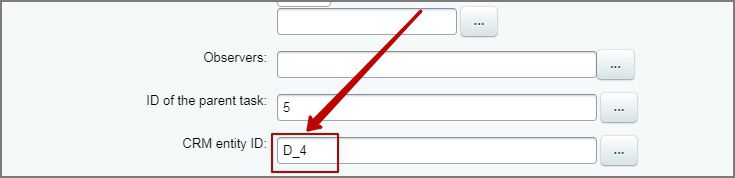
- ID of the parent task — if the created task will be related to some parent task, specify here the ID of the parent task
- CRM entity ID — if the created task will be related to any CRM entity, specify here its ID. Here the fundamental difference from the standard mechanism is that the entity of CRM can be dynamically transferred through the parameter (variable) of the business process. In this case, you have to specify the entity type in the activity parameters using the prefix: D_ - deal, L_ - lead, C - contact, CO_ - company. For example, D_4 - lead with ID 4.
- Checklist — you can add a checklist to the task. To add another item, click Add.
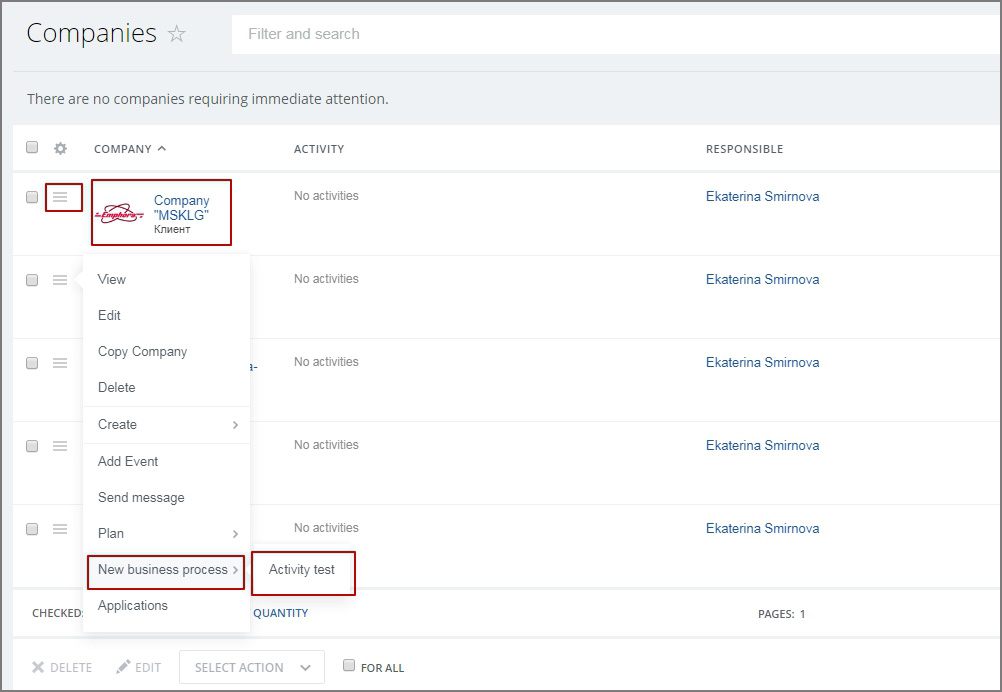
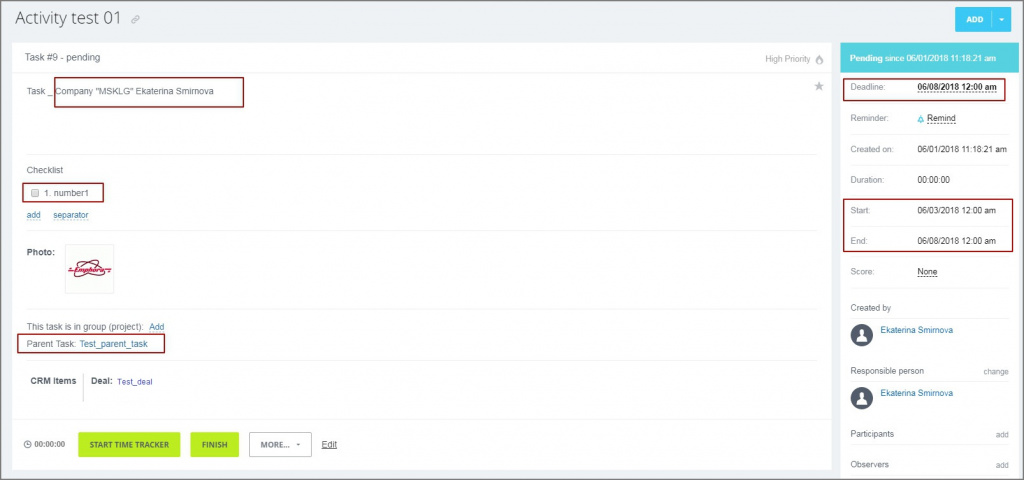
Now let’s start a business process for one of the companies.
As a result, the subtask was created for the parent task we indicated, with all the settings described by us.

To bind a task to several CRM entities at once, specify the CRM entities separated by a comma in the corresponding field.